Team and roles
Invite colleagues, choose their role and exactly what they can access, and change or remove access later.
Members is where you give colleagues access to your organization in Orvelt Business. Open it from the sidebar.
Customers and subscribers are not members. They use the Storefront app and never appear here.
Roles
Every member has one role.
| Role | Who it's for | What they can do |
|---|---|---|
| Owner | The person who created the organization. | Everything in the organization, including billing. |
| Admin | Managers you trust with everything. | Every organization feature. Admin access can't be customized. |
| Member | Everyone else. | Only the project teams and product access you give them. |
Product access for Members
When you invite a Member, you choose which parts of Orvelt Business they can use:
| Access | Lets them... |
|---|---|
| Team | Create projects and manage project teams. |
| Outcomes | Read opinions and answers, and reply to opinions. |
| Delivery | Create QR codes and personal links, and manage the website form. |
| Research | Manage goals, questions, and Priority Tags. |
| Subscribers | Invite, view, and block subscribers. |
| Storefront | Edit the public Storefront details and location. |
| Knowledge base | Add and edit knowledge and Business terms. |
| Webhooks | Set up webhook destinations. |
| API keys | Create and delete API keys. |
Standard access is selected for you; adjust it to fit the person's job.
Examples:
- A shift manager who replies to reviews: Member, Outcomes, on their location's project team.
- A marketer running campaigns: Member, Research, Delivery, Subscribers, on every project team.
- A developer integrating your shop: Member, API keys and Webhooks.
Invite someone
Open Members. Check Pending invites and the Members table first: they may already have access.
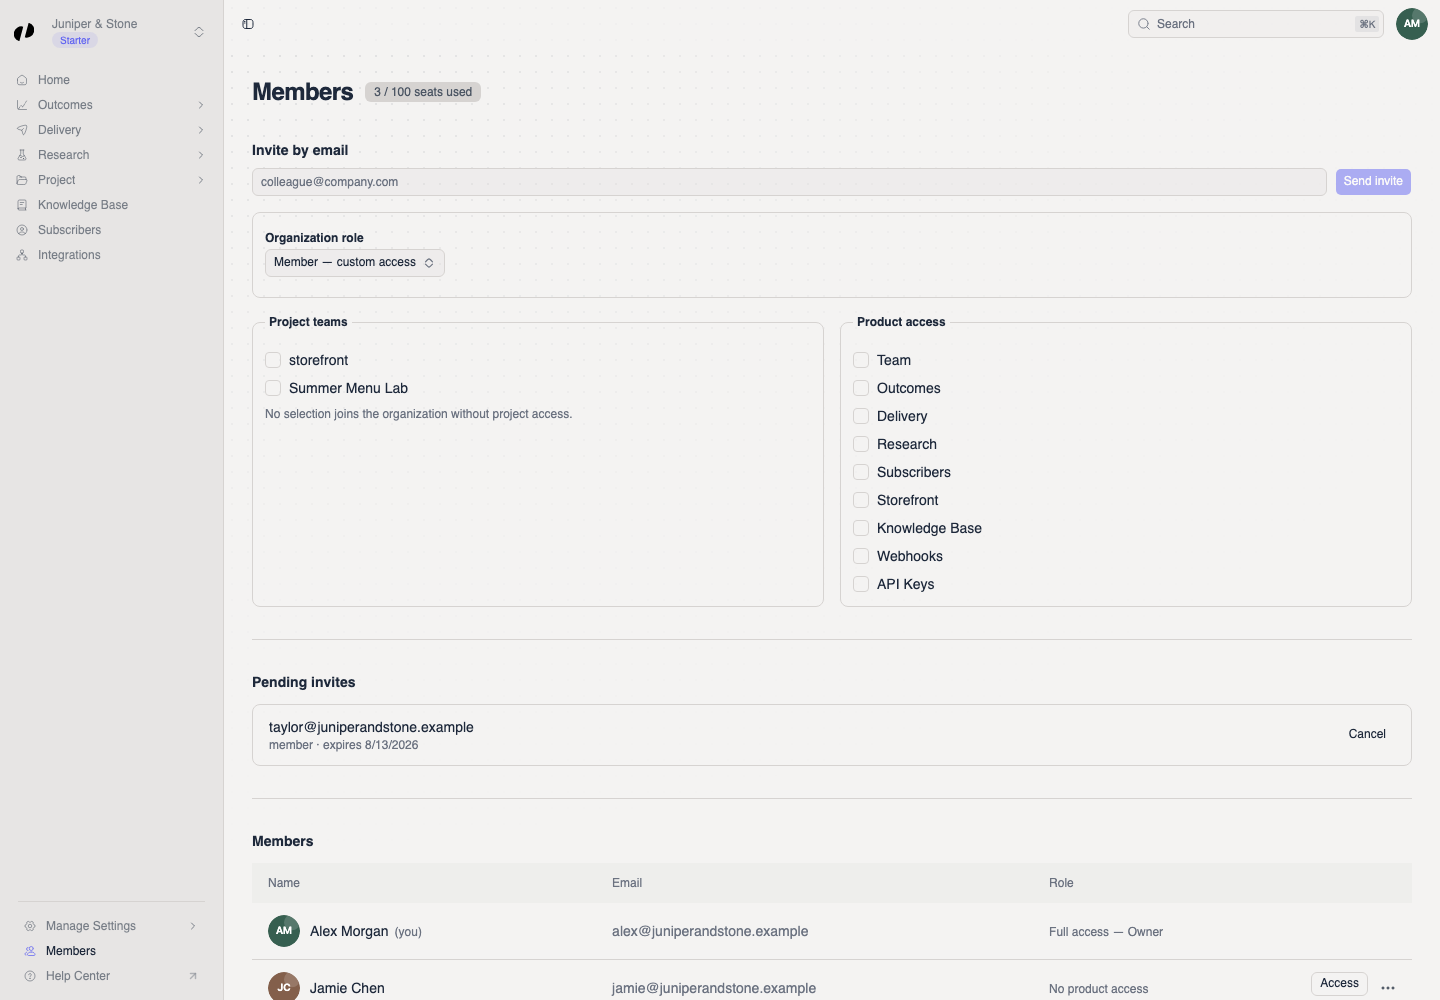
Under Invite by email, enter their email address.
In the role menu next to it, choose Member or Admin.
For a Member, select the settings icon (Customize access). In Customize invite access:
- Under Project teams, select each project they should work on. Select none and they'll join without access to any project.
- Under Team and product access, select what they can do.
- Select Done.

Select Send invite. The Send this invitation? dialog summarizes the role, project teams, and access. Select Review access to change anything, or Send invitation.
A message confirms Invitation sent to the address, and the invite appears under Pending invites with its expiry date. When your colleague accepts, they move to Members.
Change or remove access
| To... | Do this |
|---|---|
| Fix a pending invite | Invites can't be edited. Select Cancel beside it, then send a new one. |
| Change a member's access | Open the ... menu in their row and choose Access. |
| Add them to a project | Open the project's Project → Team. Project team |
| Remove a member | Open the ... menu in their row and choose Remove. Their access ends immediately. |
Limits
Your plan sets how many team members each project can have, and how many additional project teams your organization can use. See Manage Settings → Billing. Billing
Common questions
They need to be on that project's team. Add them under Project → Team, or choose Access in their row on Members.
Ask them to check spam. If it's still missing, check the email address under Pending invites; if it's wrong, Cancel and send a new invite.
An invitation must be accepted while signed in with the email it was sent to. Ask them to sign out and sign in with that email, or send a new invite to the address they use.